If you have just shot your first color infrared images (using a 590nm, 665nm, or 720nm filter), you might be confused. Instead of the blue skies and white/gold trees you saw online, your photos probably look like a wash of red, brown, and magenta.
Your camera isn’t broken. This is just how digital sensors record infrared light.
To get the classic “Blue Sky” look from a standard IR filter, you need to perform a technique called Channel Swapping.
Why Do We Need to Swap?
Digital sensors use a Bayer filter array (Red, Green, and Blue pixels).
- Visible Light: The sky is blue, so it registers on the Blue pixels.
- Infrared Light: The sky absorbs IR, so it is dark. But foliage reflects IR strongly.
- The Problem: Sensors interpret IR light primarily as Red.
So, in your raw IR photo, the foliage (IR) looks reddish/white, and the sky (dark) looks reddish/brown. To fix this, we need to tell Photoshop to swap the values: “Make the Red stuff Blue, and make the Blue stuff Red.”
Step 1: White Balance First
Before you even open Photoshop, you must set the correct White Balance in your RAW editor (Lightroom, Camera Raw, etc.).
- Use the White Balance Dropper tool.
- Click on something that should be neutral, like green grass or foliage.
- Your image should now look like this: The sky is a brownish-orange, and the trees are a white/blueish cyan.
- Open the image in Photoshop.
Step 2: The Channel Mixer
This is where the magic happens.
- Go to the Layers panel.
- Click the “New Adjustment Layer” icon (half-filled circle) and select Channel Mixer.
- Select the Output Channel: RED
- Change Red from
100%to0%. - Change Blue from
0%to100%.
- Change Red from
- Select the Output Channel: BLUE
- Change Red from
0%to100%. - Change Blue from
100%to0%.
- Change Red from
Tip: You leave the Green channel alone for standard swaps.
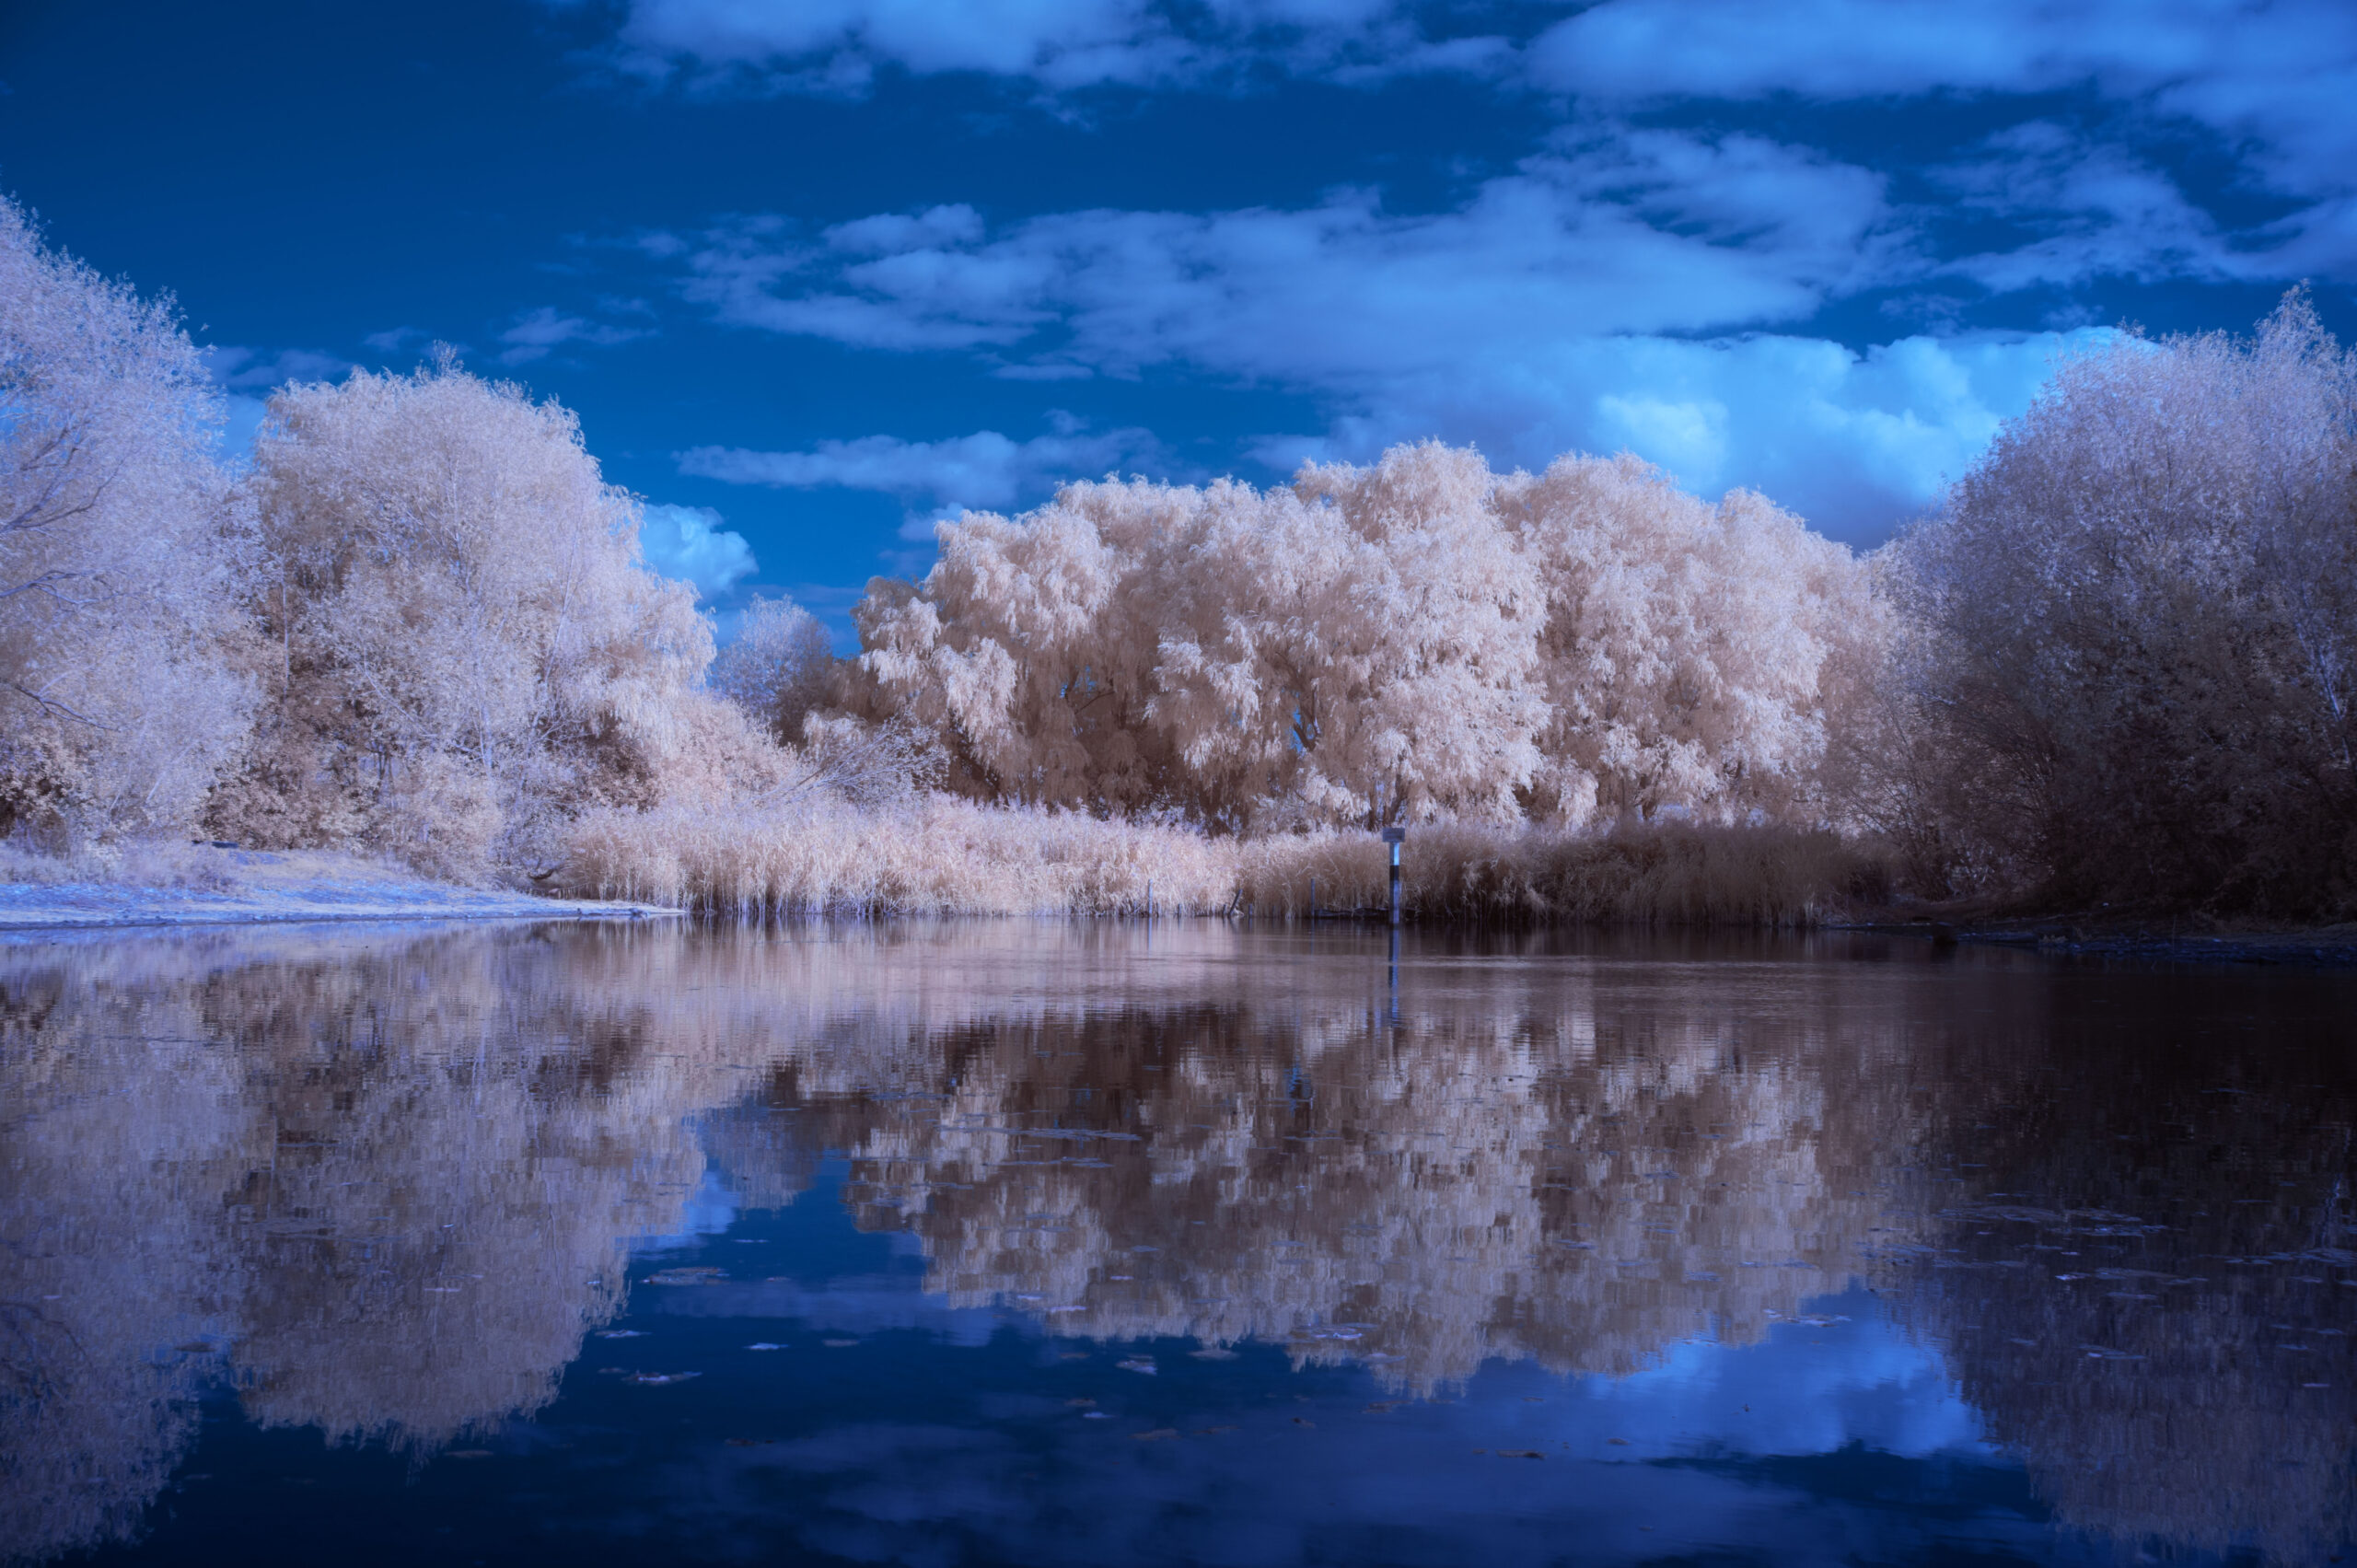
Step 3: The Result
Instantly, your image will flip. The brownish sky will turn a deep, rich blue. The cyan trees will turn a golden yellow (if using 590nm) or white (if using 720nm). Yes, I’m suggesting channel swapping images shot with the ‘monochrome’ 720nm filter. Wondering why you should swap your 720nm images? Read my explanation on [The Science of 720nm Swapping] to see why it helps remove muddy skies.
Step 4: Hue Shifts (The Secret Sauce)
The swap gets you 90% of the way there, but the colors might feel a bit “off.”
- Add a Hue/Saturation adjustment layer.
- Select the Master or Yellows channel.
- Gently shift the Hue slider.
- With a 590nm filter, you can shift the yellow foliage to be Gold, Orange, or even Pink.
- With a 720nm filter, you usually just want to desaturate the yellow slightly to get pure white trees against a blue sky.
Can Lightroom Do This?
Not natively. Lightroom’s “Calibration” or “HSL” sliders cannot perform a true channel swap (mapping Red input to Blue output). You must use Photoshop, or install a custom “lut” (Look Up Table) profile into Lightroom to handle the swap for you.
Summary
Channel swapping is the bridge between the raw data your sensor sees and the creative image your mind imagines. It takes 30 seconds to do, but it makes the difference between a “mistake” and a masterpiece.