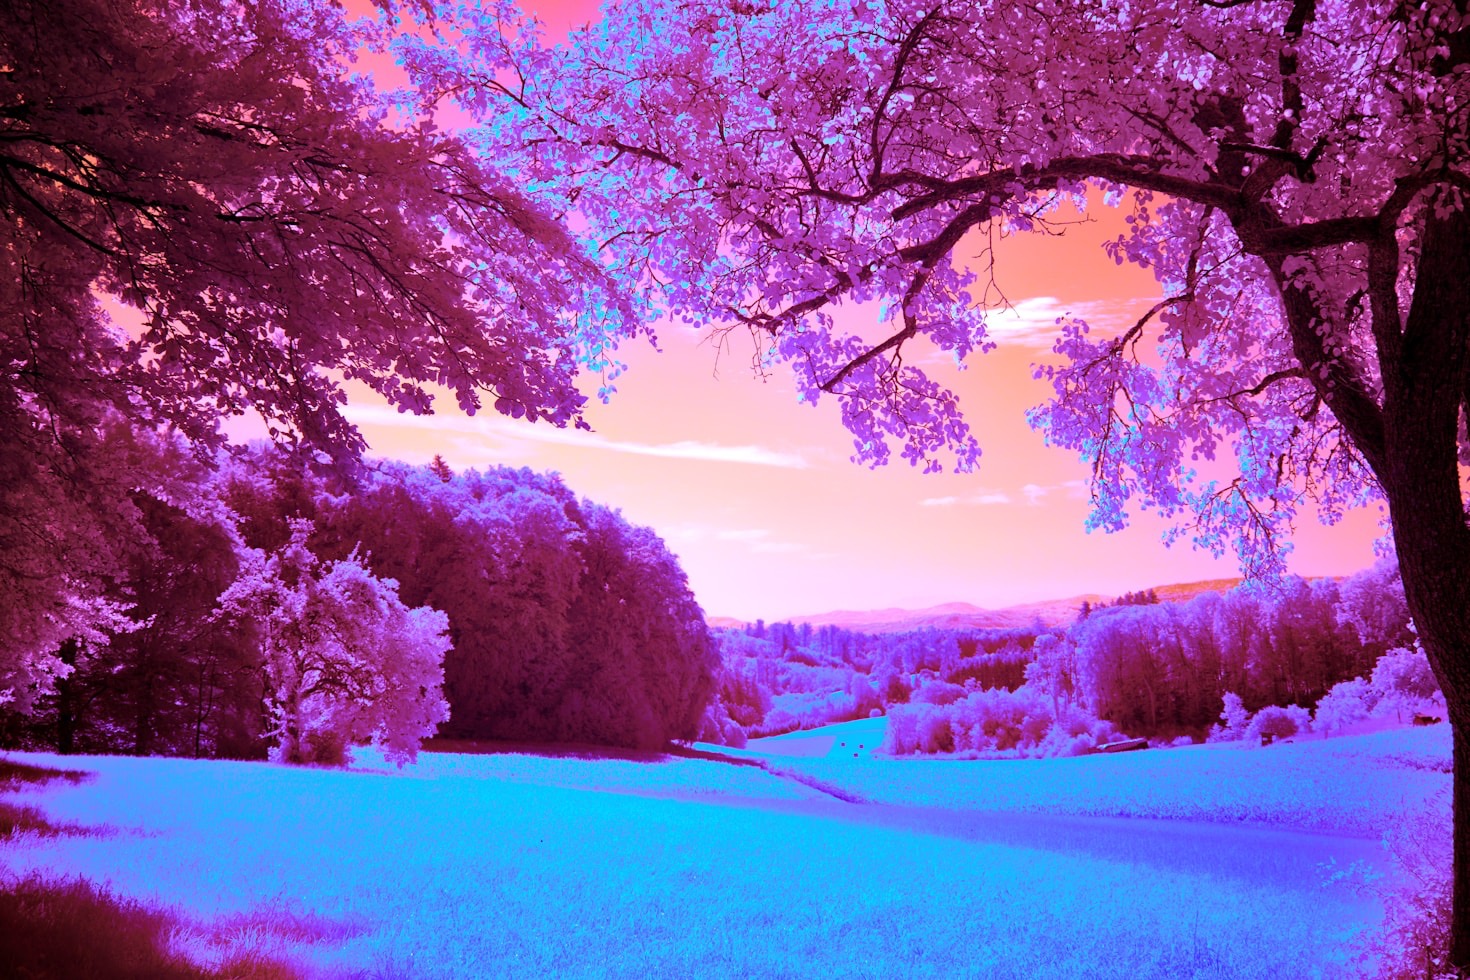
When you shoot using the ‘colour IR’ range of filters (550-665nm) you can go far beyond the classic red/blue channel swap. Here are some advanced tricks that work well in Adobe Camera Raw (ACR) and Photoshop:
1. Push the White Balance Beyond Normal Limits
- Trick: In ACR, set a custom white balance on foliage (which reflects strongly in IR).
- Why: This pulls your foliage toward neutral/white, giving you room to remap sky and water tones into surreal blues or cyans.
- Pro tip: If ACR’s WB slider maxes out – it probably will – use the Camera Calibration panel (or a DNG profile editor) to shift the WB further into the red channel range.
2. Multi-Channel Swap Variants
The classic is Red ↔ Blue swap, but you can try:
- Red ↔ Green swap → Skies go teal, foliage shifts to magenta.
- Rotate channels cyclically (R→G, G→B, B→R) → Creates a three-tone “Kodachrome on acid” look.
- Partial swaps using Apply Image with opacity → mix channels instead of swapping 100%.
3. Gradient Maps for Controlled Colourisation
- Convert your IR image to a strong monochrome base first (good tonal separation).
- Apply a Gradient Map adjustment layer to map tones into custom surreal palettes (e.g. cyan → gold, purple → mint).
- Works best after doing a basic channel swap to separate sky/foliage tones.
4. Double-Processing RAW Files
- Process the same IR RAW twice in ACR: once with WB/tones for foliage, once for sky.
- Open both as layers in Photoshop, mask them together → more control than a global channel swap.
- You can exaggerate the “white foliage, blue sky” look this way without losing subtle detail.
5. False-Colour Skin Tones
For portraits with a 590–665 nm filter:
- Do a partial channel swap so skin retains a warm or bronze tone while background foliage shifts toward cool tones.
- Use Selective Color or Hue/Saturation layers to tame the weird yellows/oranges that skin can develop.
- IR softens blemishes naturally — adding a warm tint on top gives an ethereal “glow.”
6. LAB Colour Mode Experiments
- Convert to LAB Colour mode in Photoshop.
- Invert or curve just the a or b channels → this remaps colour relationships in ways impossible in RGB.
- Convert back to RGB for finishing. This often yields dreamy, painterly false-colour palettes.
7. IR + Visible Blending
If you’ve shot with a 550–590 nm filter (which still admits some visible light):
- Shoot a normal visible-light frame and your IR frame.
- Blend them in Photoshop as layers (e.g. IR on top, Soft Light or Luminosity mode).
- This hybrid keeps realistic skin/sky tones but overlays the glowing IR foliage, giving a cinematic, otherworldly mix.
👉 The creative key with false-colour IR is to treat it less like ‘colour correction’ and more like ‘colour invention.’ You’re mapping invisible wavelengths into visible hues, so there’s no single right answer – only what looks compelling.