These are the foundational tricks that most IR shooters start with. They are quick and repeatable, and they don’t require diving deep into LAB colour or double-processing techniques. They will give you reliable results and provide a foundation of understanding that will help when you move on to more advanced experimental processes.
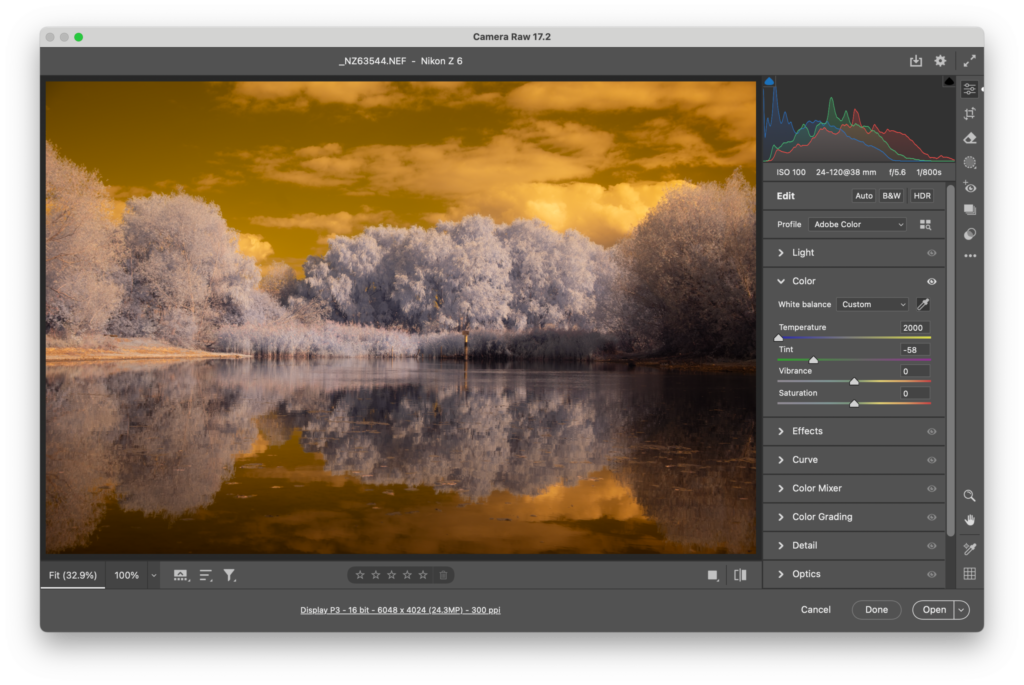
- Open the RAW file in Adobe Camera Raw and set the white balance by sampling foliage
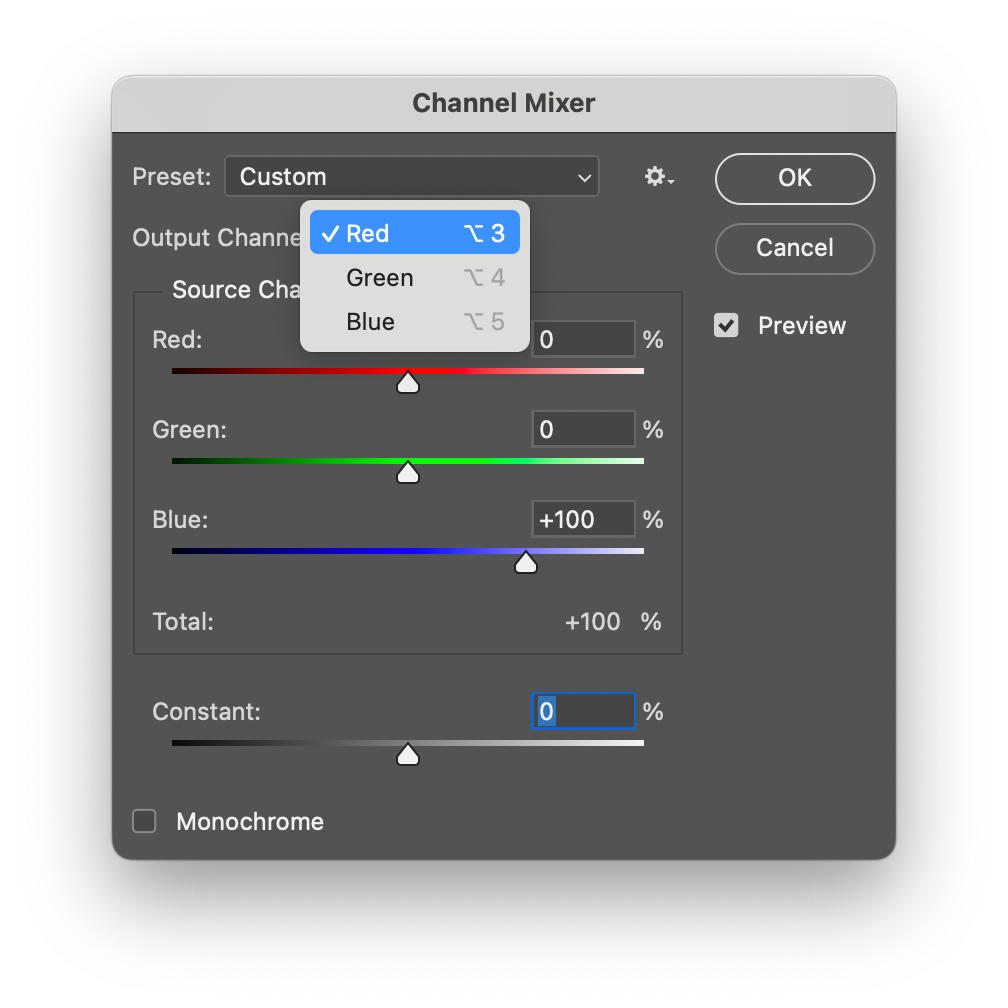
- In Photoshop, use the Channel Mixer to switch the values for red and blue
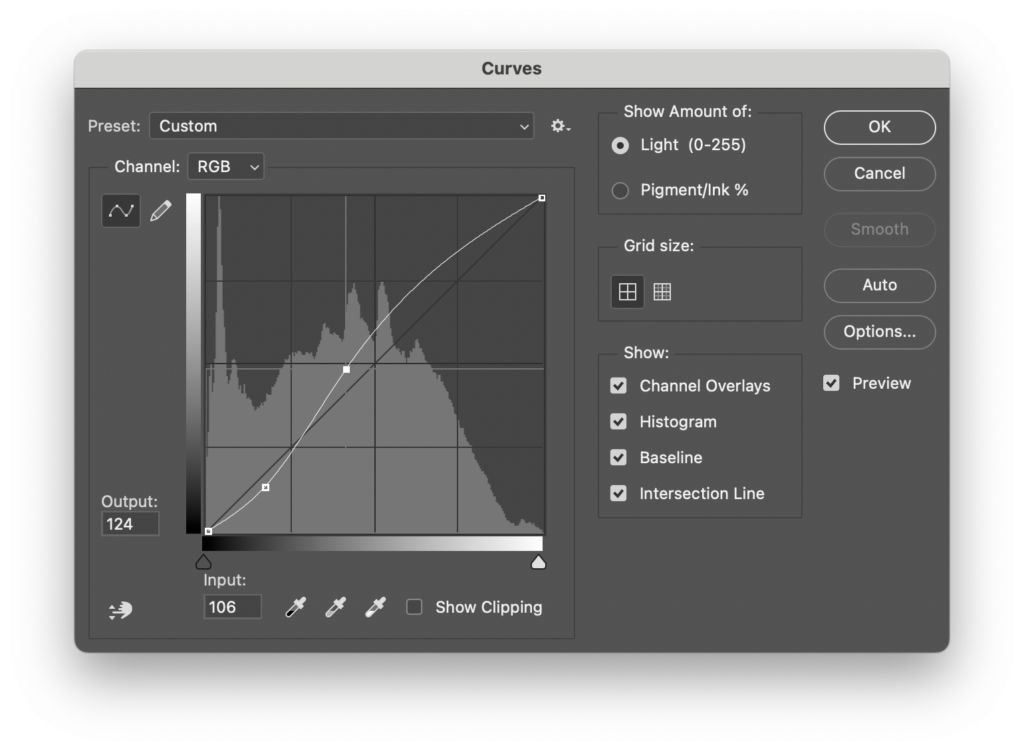
- Use Curves to add contrast and lighten as required
- Use Hue/Saturation to tweak specific colour ranges
- (Optional) Convert to monochrome using the Black & White controls for a high-contrast IR look.
1: White Balance on Green Foliage
In Adobe Camera Raw or Lightroom (or your preferred RAW photo editor), use the white balance eyedropper on a patch of grass/leaves.

This helps neutralise the overwhelming red cast from IR capture. It also sets you up for cleaner channel swaps later.
2: Classic Red ↔ Blue Channel Swap
Open the image in Photoshop, then go to Image > Adjustments > Channel Mixer.
- In the Red output channel set Red to 0 and Blue to 100
- In the Blue output channel set Blue to 0 and Red to 100

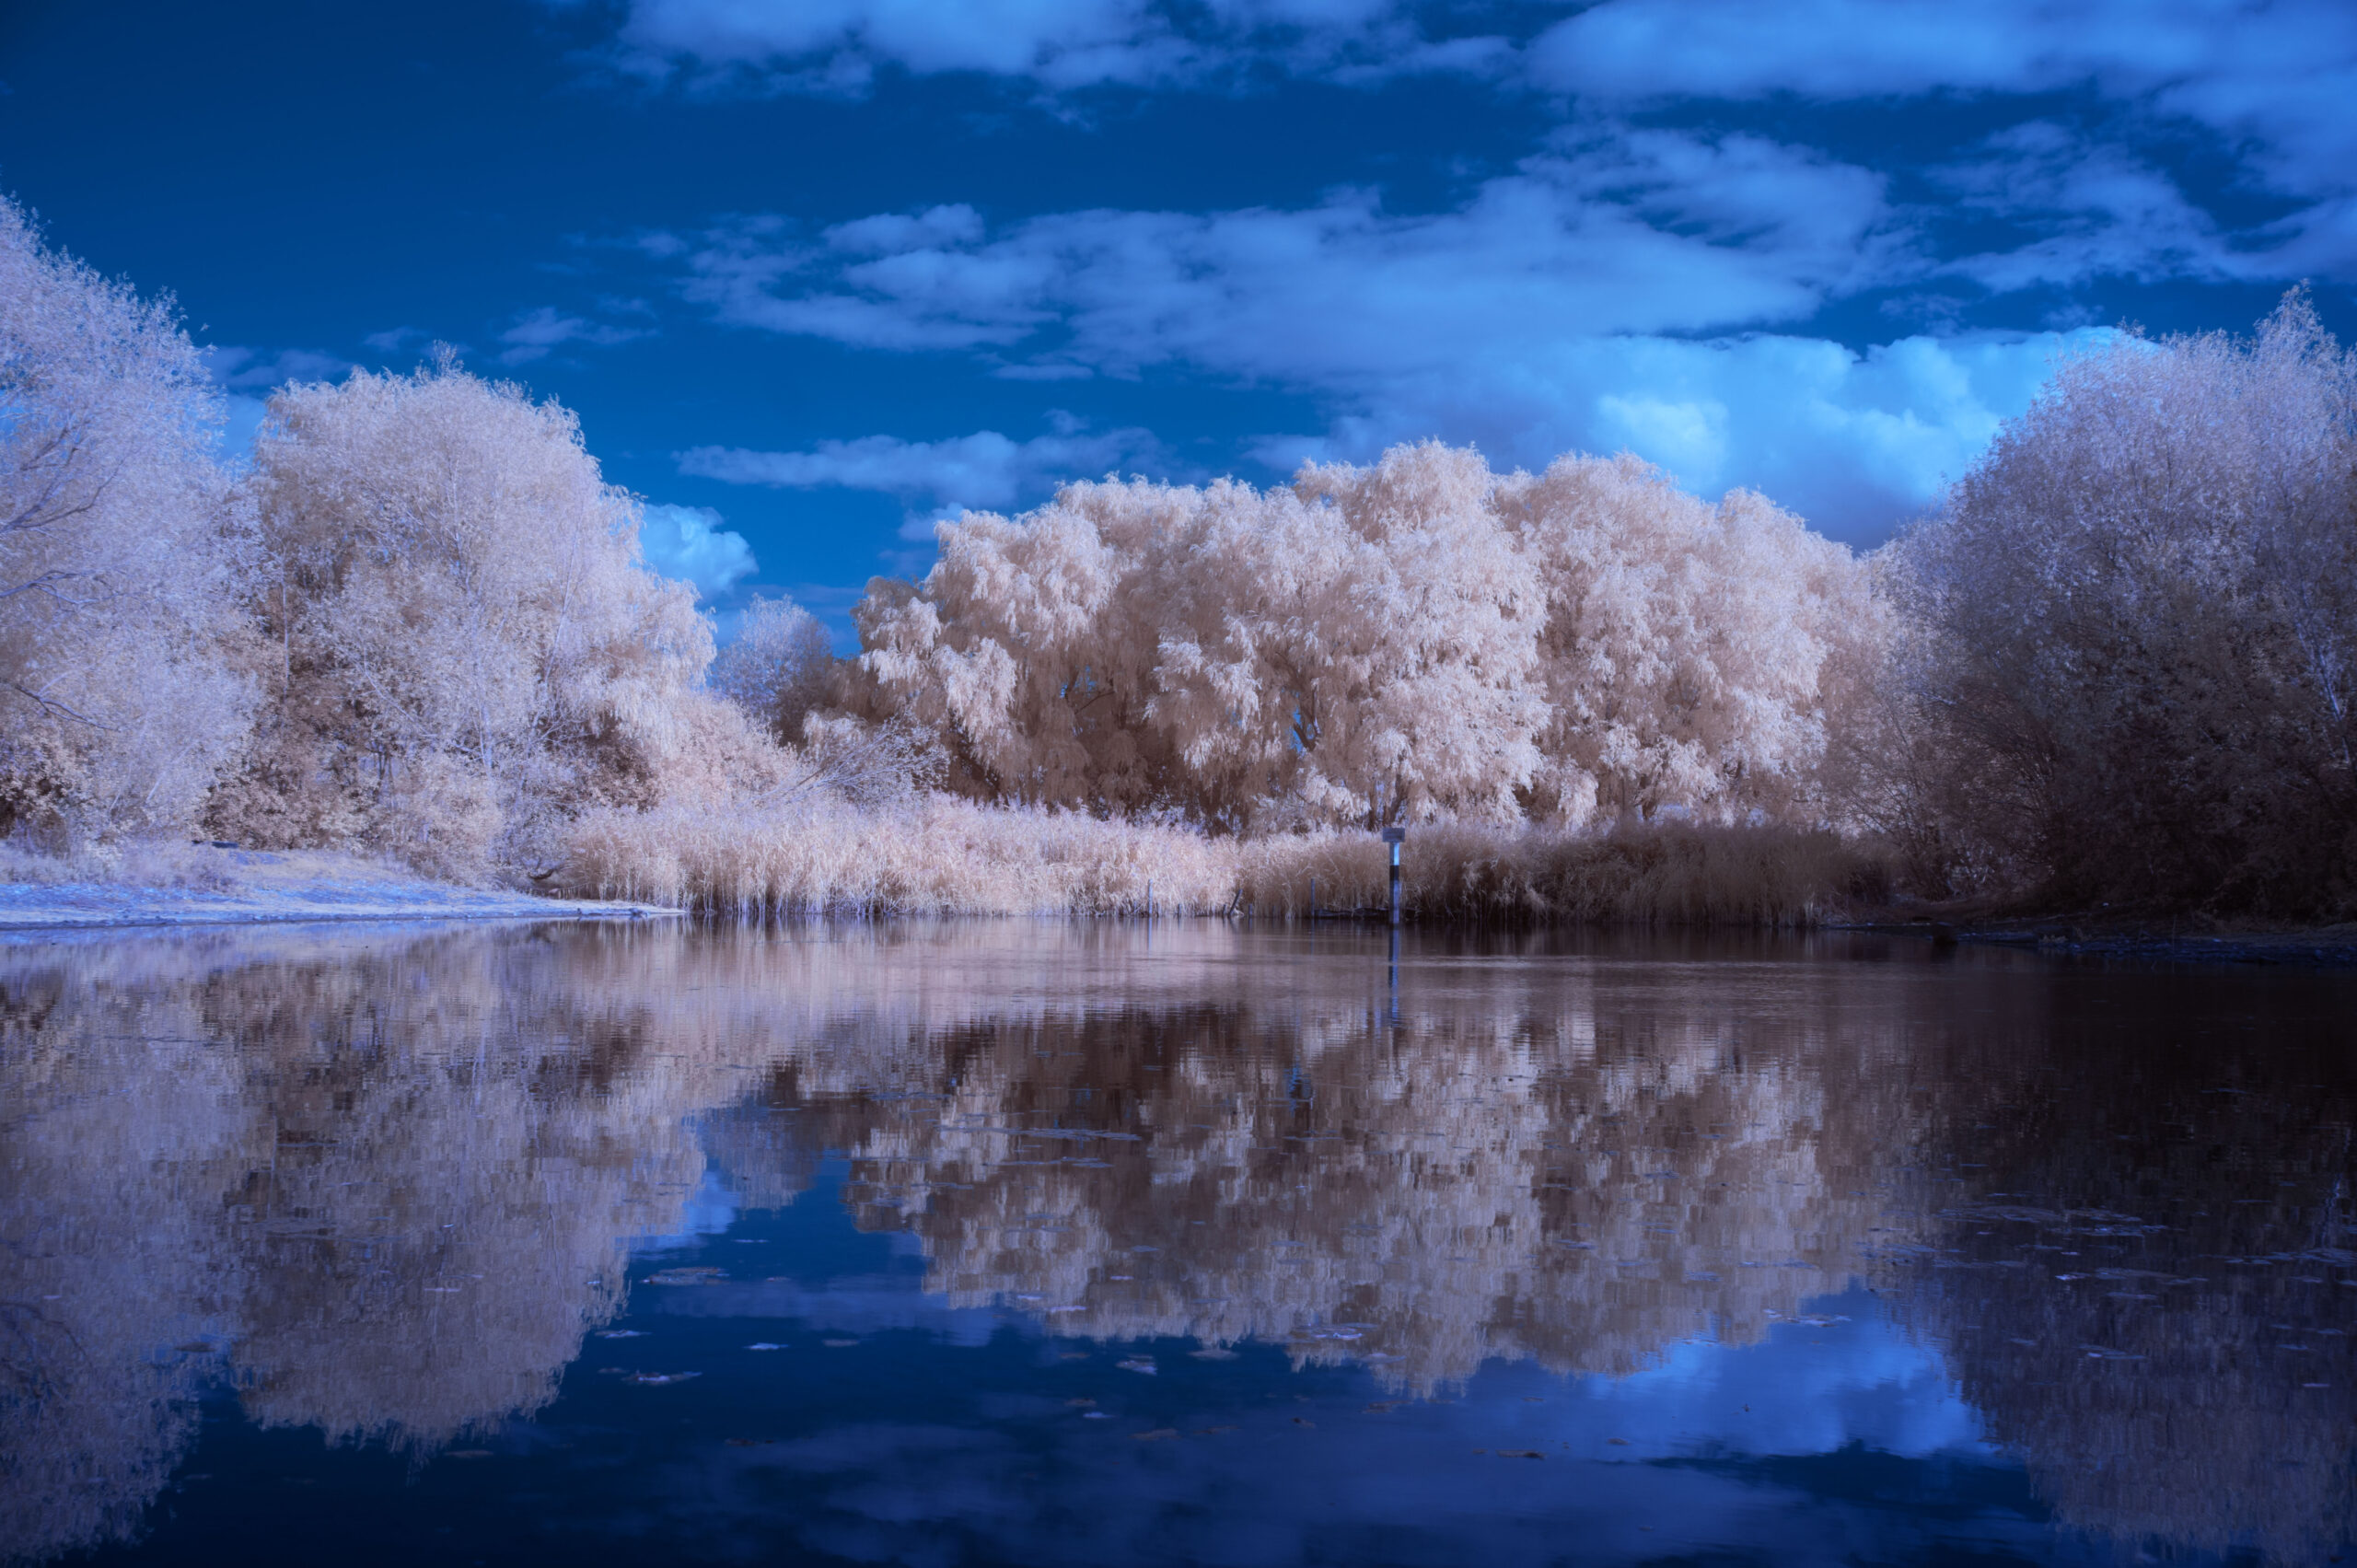
This will make skies turn blue (ish) and foliage turn white (again, ish), the ‘standard’ false-colour IR look.
3. Boost Contrast with Curves
IR images can feel flat and a little dull straight out of camera, but this can be adjusted fairly easily. Go to Image > Adjustments > Curves and apply a simple S curve, either from the presets or by adjusting the curve yourself.

Darkening the shadows will help deepen the skies, and brightening the highlights can help already-pale foliage to pop.
4. Hue/Saturation Quick Tweaks
After channel swap, foliage may have odd tints, for example yellow or cyan. Use Image > Adjustments > Hue/Saturation and target specific colour ranges:
- Push blues more toward cyan for surreal skies.
- Nudge yellows toward white or gold for glowing foliage.
5. Optional: Desaturate to Monochrome IR
Sometimes, color IR can look messy or overwhelming. If this is the case, convert to the image to black & white to emphasize the ethereal tonal contrast. Use Image > Adjustments > Black & White and try presets or play with the sliders.
Remember that starting with a colour IR image will put a limit on how far you can go with inky skies, glowing white foliage and smooth skin tones. If this is your planned end result then shoot with a filter of 720nm or higher.
These basics give you predictable, repeatable results. Once you’re comfortable, you can layer in advanced tricks (gradient maps, LAB mode, double-processing) to push the look further.
